How to Build a Base For Your Ikea Cabinets

How to Build a Base for your Ikea Cabinets

There’s a few really good reasons as to why you might want to build a base for your ikea cabinet. The first, and in my opinion, the most important reason is because of much you can elevate the look of your ikea cabinets with a custom base. Suddenly your cheap-o cabinets go from looking like a 6/10 to a 8/10. Slap a coat of paint on that and you have an 11/10. But this post isn’t about paint, it’s about building a base for your ikea cabinet.

The next reason why I would suggest that building a base for your cabinet would be crucial is if you have a carpeted space like me, a base makes it’s a lot easier to open and close those doors.

Recap – you should build a base for your ikea cabinet to elevate the look and make it look custom and if you have carpet. Plus, it’s SO easy to build these bases, let me show you.

Build A Base For Your Ikea Cabinets

One room challenge week three - the week I got it together by building two built ins with bases

Looks really good, doesn’t it?!

Here’s what you need to build a base for your Ikea Cabinets:


Before you pick out your materials, you need to know what dimensions you’re building a base to – do you want it inset, how high do you want it, are you going to put a face frame on it? The following is based on measurements for my Ikea Ivar Cabinet where my base is inset by 1/2 an inch. My base is 30 inches x 19 1/4 inches and 1.5 inches high.

how to build a base for your ikea cabinets including using a jig to secure the corners

Material Needed to Build A Base for your Ikea Cabinets

  • 20 feet of 2’x2′ SPF (this gives you a buffer)
    • cut into four 30 inch pieces
    • cut into four 19 1/4 inch pieces
  • Kreg Pocket Hole Jig (I was gifted the 720 pro and HOLY MOLY I am in love)
  • 16 x 2 1/2 inch pocket hole screws
  • Clamps
  • Drill + bits for the kreg jig
build a base for your ikea cabinets - a corner of the finished base

Instructions to Build A Base for your Ikea Cabinets

  1. If you already have your piece cut to size, use your pocket hole jig to make two pocket holes on either side of your short pieces (short pieces pictured below). You will have four holes per short piece.
  2. Using a clamp, clamp together your short and long pieces. Make sure that the corners line up and that you have a 90-degree angle between (you can use a speed square if you need it). Using the kreg drill bit, screw in your screws.
  3. Repeat this process for all of the sides until you’ve made your box.
  4. That’s it. This may be the easiest thing I’ve shared so there really isn’t any excuse not to build a perfect box for your Ikea cabinets!

PS – you can do this without the pocket hole jig, just make your cuts mitred and secure the boards screwing in at an angle. The pocket hole jig does make your life mighty good. 

build a base for your ikea cabinets - the finished base
An Ikea Ivar box that Signed Samantha has a hack for and is sharing during the one room challenge week three.

Comments

  • Lauren

    Did you feel like you needed to secure the base of the cabinets to the flooring? Or will it stay pretty secure without it? We are looking into building an office in a carpeted room as well and were curious if we would have to cut carpeting to attach the desk/cabinets to the wood flooring underneath!

    • Samantha

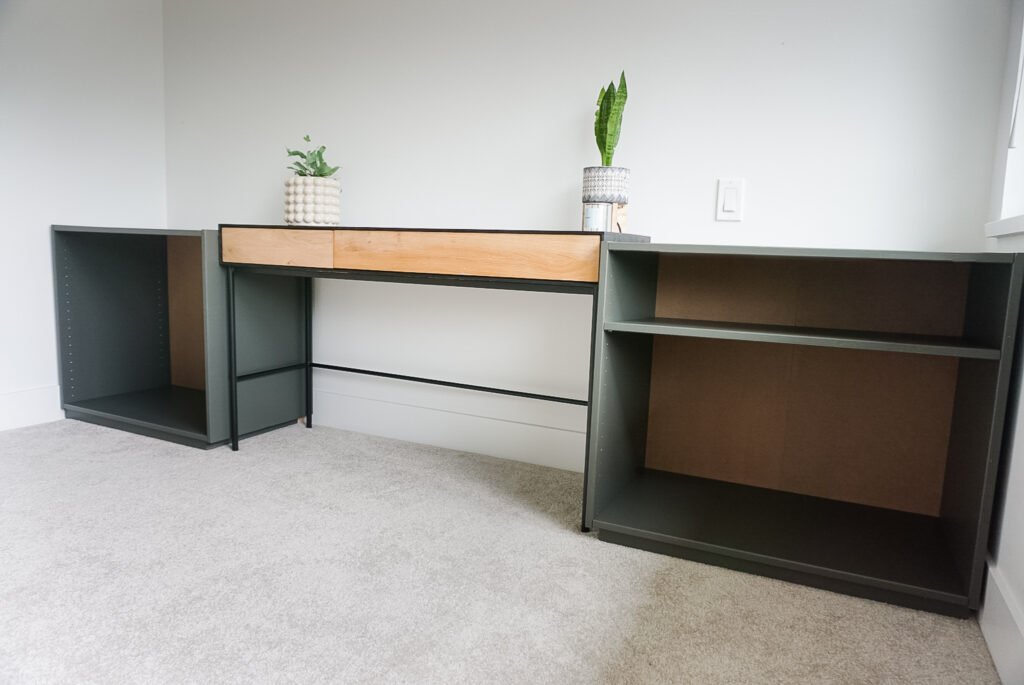
      Great question – I opted not to since I knew I would also have the weight of the bookshelf on top. Mine has not moved at all. If you don’t have the additional weight of something on top or you think it will be very well used (i.e., for a kids space), I would think about securing it. You could also look to secure it into the stud of the wall.

  • Josh

    what is the size of the wall? is it 10ft wide? 10ft tall?

    • Samantha

      Great question – It’s a 10 ft long wall and 8 ft tall

      • Erica B

        Hi! What width cabinet should I go with if the wall is 8ft wide? I’m not sure if 30 inch cabinets would work. Maybe 24 inch?? What do you think?

        • Samantha

          I would personally probably go with 24″ just to give yourself a little more space for your chair and some wiggle room. That being said, if you have a lot of stuff you want to store in the cabinets, I would consider that too!

  • Denise

    Hi Samantha! We purchased two of the Ikea Ivar cabinets but they are NOT the same ones you got. Ours are 1/2 the depth and too tall. But on Ikea, I don’t even see other optional measurements. Can you help?

    • Samantha

      Hi Denise! Oh no!!!
      So I trimmed mine down which would explain that – but there is another size that the Ivar used to come in which was double the depth and closer to 18″ (I believe!). I’m going to update my Ivar post with that detail now because I’ve recently received an influx of people who are experiencing the same problem! I’ve heard there’s a big shortage… but depth wise I am not sure how to fix it!!

Leave a Reply

Your email address will not be published. Required fields are marked *